July 20, 2009

Wheat Berry Salad

Music: City Park Jazz, once again...have I mentioned how much I love Denver :)
Menu: Wheat Berry Salad, wine, and I believe there was a Ho-Ho cupcake involved somewhere in the night!


Alright, so here is the beginning of this story. I have discussed our AMAZING supermarkets in Denver, yes? Well, for those lucky enough to live in Sunflower Market districts, you have experienced the excellent selection met with even greater prices. N-E-WAYS, they have a great bulk section, and I mean pretty great. I get most of the grains, nuts, and granola that we eat from here. Naturally, I peruse this section and scout out unknown stuff. Wheat berries has unfortunately been one of those things. I finally found a simple and great sounding recipe to debut this grain into our diet.


The end of the story is yum, yum, yum...yum, yum, yum. Really. They are a tiny bit starchy, with a little bite, but with a hint of sweetness...in other words full of flavor for a whole grain. Definitely two thumbs up from us!


Wheat Berry Salad
Adapted from Cooking Light

Ingredients:
  • 1 1/4 cups wheat berries
  • 2 1/2 cups chopped English cucumber
  • 2/3 cup thinly sliced green onions
  • 1 1/2 cups loosely packed chopped arugula (I used spinach)
  • 6 TB minced fresh flat-leaf parsley
  • 1 pint grape tomatoes, halved (I used chopped vine ripe tomatoes)
  • 1 TB grated lemon rind
  • 3 TB fresh lemon juice
  • S & P
  • 1/2 tspn sugar
  • 2 TB EVOO
  • 3/4 cup (3 ounces) crumbled goat cheese (I used feta)
Directions:
  1. Place wheat berries in a medium sauce pan, cover with water (with at least 2 inches above berries). Cover and let stand for 8 hours, drain.
  2. Place wheat berries in same saucepan and cover with fresh water. Bring to a boil, reduce, heat, and cook, uncovered for 1 hour or until tender. Drain and rinse with cold water.
  3. Place wheat berries in a large bowl and combine with cucumbers, green onions, arugula, parsley, and tomatoes.
  4. Separately, combine lemon rind, juice, S & P, and sugar in a small bowl. Gradually whisk in EVOO. Drizzle dressing over the salad, and toss well to coat.
  5. Top with cheese and let stand at least 20 minutes before eating to let the flavors combine.

July 19, 2009

Broiled Tilapia with Thai Coconut-Curry Sauce

Music: Antibalas Afrobeat Orchestra, "Who Is This America?"
Menu:
Brown basmati rice, sauteed spinach


This was a great, quick, very flavorful weeknight meal. I put the rice on the stove, went for a quick run, came back chopped the veggies and ate dinner within 20 minutes...a-mazing. The recipe is not spicy, a little salty, but lots of flavor. I made the full amount of sauce for just the two of us (can't say two fillets, because BJ had two himself!). But the rice was great drenched in the sauce. MMMMMM, and the most perfect bite was a little bit of spinach, rice, and fish with lots of sauce.

Actually, I am thinking about making some of this sauce just to have to dip things in. Yes, maybe I will.


Broiled Tilapia with Thai Coconut-Curry Sauce
from Cooking Light

Ingredients:
  • 1 tspn. dark sesame oil, divided
  • 2 tspn. peeled minced ginger
  • 2 garlic cloves, minced
  • 1 cup finely chopped red bell pepper
  • 1 cup chopped green onions
  • 1 tspn. curry powder
  • 2 tspn. red curry paste
  • 1/2 tspn. ground cumin
  • 4 tspn. low-sodium soy sauce
  • 1 TB brown sugar
  • S & P
  • 1 (14-ounce) can light coconut milk
  • 2 TB chopped fresh cilantro
  • 4 (6-ounce) tilapia fillets
  • Cooking spray
  • 3 cups hot cooked basmati rice
  • Lime wedges, for garnish

Directions:

  1. Preheat broiler.
  2. Heat EVOO in a large nonstick skillet over medium heat. Add ginger and garlic; cook 1 minute. Add pepper and onions; cook 1 minute. Stir in curry powder, curry paste, and cumin; cook 1 minute. Add soy sauce, sugar, 1/4 teaspoon salt, and coconut milk; bring to a simmer (do not boil). Remove from heat; stir in cilantro.
  3. Brush fish with 1/2 teaspoon oil; sprinkle with 1/4 teaspoon salt. Place fish on a baking sheet coated with cooking spray. Broil 7 minutes or until fish flakes easily when tested with a fork. Serve fish with sauce, rice, and lime wedges.

July 18, 2009

Beet and Brown Rice Salad

Music: Jimmy Cliff, "The Harder They Come" - A little summertime music for a summertime meal!
Menu: Dijon mustard and apple cider vinegar grilled pork chops, and Kate's green beans with mint.

As promised, another beet recipe. I'm serious about learning to like these nutrient-packed, bright-red, crazy little buggers. Guess what? It worked this time!! This salad is so, so, so good. My sister was weary and she had a friend over that also looked at me like I was crazy when I asked him if he liked beets. But everyone at the table asked for seconds, I know, I was stunned too. This recipe is actually pretty simple. There is not a lot of hands on time. Best part: you cut the beet before it cooks, reducing the murder-like scene that usually happens after roasting a beet to only cut up right after. There was still a bit of red, but I used an extra plastic cutting board I have a kept the mess concentrated to that and my hand.


After the last experience with beets, I was determined to try again, knowing that if I could find the right flavor combos, I would love 'em. The next quest came after an epic trip to our local farmer's market. The above picture contains one bag of purchases from a farm just outside the city. Ready for this one....everything pictured was $5. Organic, local produce, and all $5. If I would have gone to the supermarket and tried to grab all this produce, looking for local and organic, my guess is that I would have spent somewhere in the range of $7-8. Organic veggies price tags are harsh. I admit, I rarely venture over to the organic bin, unless I see big yellow sale tags. Even then, I usually cannot meet the price. So, if you're in the same boat, but local and check out some farmer's markets in your area.

Enjoy your beets and I hope this one converts you as it has me :)

Beet and Brown Rice Salad
Adapted from Martha Stewart

Ingredients:

  • 1 cup brown basmati, or other brown rice
  • 1 bay leaf
  • S & P
  • 1/4 cup pine nuts*
  • 2 tspn. EVOO
  • 1 onion, finely chopped
  • 1 TB minced garlic
  • 4 medium red beets or about 1 pound without greens, peeled and cut into 1/2-inch cubes
  • 2 tspn. lemon zest
  • 1/4 cup chopped fresh flat-leaf parsley, plus more for garnish*
  • 2 ounces (about 3/4 cup) soft goat cheese, crumbled*
* I used pecans, cilantro, and feta cheese because I had those things on hand. It still came out incredible and I didn't have to make a special trip to the store and spend extra money to make the recipe exactly as printed.

Directions:

  1. Bring 1 1/2 cups water to a boil in a small saucepan. Stir in rice, bay leaf, and salt; cover. Reduce heat to low; simmer 30 minutes. Remove from heat; let stand, covered.
  2. Meanwhile, toast pine nuts/pecans in oil in a 10-inch skillet over medium heat. Cook, stirring, until nuts are just browned, about 5 minutes. Transfer nuts with a slotted spoon to a small bowl.
  3. Reduce heat to medium-low; add onions and garlic to skillet. Cook, stirring occasionally, until onions are translucent, about 8 minutes. Add beets and 1 teaspoon salt; season with pepper. Cover; cook, stirring occasionally, until beets are tender, about 25 minutes (if beets stick to skillet, add up to 1/4 cup water).
  4. Remove bay leaf from rice. Stir rice, half of pine nuts, the lemon zest, and parsley into beet mixture. Transfer to a platter. Top with remaining pine nuts and the goat cheese. Garnish with parsley. Serve warm or at room temperature.

July 16, 2009

Zucchini and Swiss Chard Pie

Music: Iron & Wine, Our Endless Numbered Days
Menu:
Spinach and dill salad with creamy feta dressing and a big slice of the Zucchini and Swiss Chard Pie

This is the first recipe using ingredients from our garden!!! We have been enjoying all our salads sprinkled with fresh dill, yumm. I have been saving this recipe specifically for our first harvest of chard. This recipe come from the NYTimes. They did a segment on Mediterranean Pie Crusts for vegetables and included a couple types and fillings. This one caught my eye becuase of the chard. It was rustic, beautiful, but a bit bland. The crust is whole wheat, but didn't have much in it to boost flavor.


The other problem was that (hold your gasps...) I don't have a proper "tart" pan, which is what this reicpe called for. All I had was a 10 inch cake pan. And I don't let things like that hold me back. But I feel that it contributed to the overly doughy-ness of my version. Needless to say, a tart pan is on my wish list!


Even without the right tools, it turned out gorgeous. And even without a lot of flavor, we gobbled it up and enjoyed the fruits of our labor in this Mediterranean rustic veggie tart....errr...pie.


Zucchini and Swiss Chard Pie
Adapted from the NYTimes

Ingredients:

Whole Wheat Yeasted Olive Oil Pastry

  • 2 teaspoons active dry yeast
  • 1/2 cup lukewarm water
  • 1/4 teaspoon sugar
  • 1 large egg, at room temperature, beaten
  • 1/4 cup olive oil
  • 1 cup whole wheat flour
  • 1 cup unbleached flour (more as needed)
  • 3/4 teaspoon salt
Filling
  • 1 recipe of the whole wheat yeasted olive oil pie pastry
  • 1 pound Swiss Chard
  • S & P
  • 2 TB EVOO
  • 1 medium onion, finely chopped
  • 2 pounds zucchini, cut in small dice (1/4 to 1/3 inch)
  • 2 to 3 large garlic cloves (to taste), minced
  • 1 teaspoon fresh thyme leaves, chopped
  • 1 to 2 teaspoons chopped fresh rosemary (to taste)
  • 2 ounces Gruyère cheese, grated (1/2 cup, tightly packed)
  • 3 large eggs, beaten
Directions:

Pastry

  1. Dissolve the yeast in the water, add the sugar, and allow to sit until the mixture is creamy, about five minutes. Beat in the egg and EVOO.
  2. Combine the flours and salt, and stir into the yeast mixture. You can use a bowl and wooden spoon for this, or a mixer — combine the ingredients using the paddle. Work the dough until it comes together in a coherent mass, adding flour as necessary.
  3. Turn out onto a lightly floured surface, and knead gently for a few minutes, adding flour as necessary, just until the dough is smooth — do not overwork it. Shape into a ball.
  4. Place in a lightly oiled bowl, cover the dough tightly with plastic wrap, and allow to rise in a draft-free spot until doubled in size, about 1 hour.
  5. Turn the dough out onto a lightly floured surface, gently knead a couple of times. Shape into a ball without kneading it. Cover the dough loosely with plastic wrap, and let rest for 5 minutes.
  6. Then roll out into thin round and line pan.*
Filling
  1. Bring a large pot of water to a boil while you stem the greens, and wash them thoroughly in several rinses of water. If the ribs are wide, wash and dice them, then set aside. Fill a bowl with ice water. When the water reaches a boil, add a generous amount of salt and the chard leaves. Blanch for 1 minute, until just tender. Using a slotted spoon or deep-fry skimmer, transfer to the ice water, then drain. Squeeze out excess water and chop. Set aside.
  2. Heat EVOO over medium heat in a large nonstick skillet, and add the onion and diced chard stems, if using. Cook, stirring, until tender, about 5 minutes. Stir in the zucchini. Season to taste with salt, and cook, stirring, until just tender and still bright green, about 10 minutes.
  3. Stir in the garlic, thyme and rosemary, and cook with the zucchini and onion until the garlic is fragrant, about 1-2 minutes. Stir in the greens, toss everything together, and remove from the heat. Taste and season with S & P.
  4. Beat the eggs in a large bowl. Stir in 1/4 to 1/2 teaspoon salt (to taste), the zucchini mixture, and the Gruyère. Mix everything together, add pepper, taste once more and adjust seasoning.
  5. Preheat the oven to 375 degrees. Oil a 10-inch tart pan or whatever you have on hand. Roll out two-thirds of the dough and line the pan, with the edges of the dough overhanging. Freeze the remaining dough.
  6. Fill the lined pan with the zucchini mixture. Pinch the edges of the dough along the rim of the pan. Place in the oven and bake 50 minutes, until set and beginning to color.
  7. Allow to rest for at least 15 minutes before serving (preferably longer). This can also be served at room temperature.

*If not using right away, freeze the dough to prevent it from rising and becoming too bready. The dough can be transferred directly from the freezer to the oven.

July 5, 2009

1st harvest of the season!

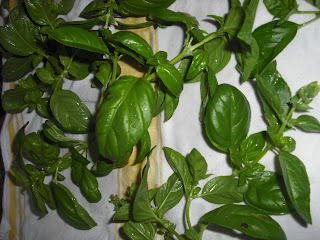
Woo hoo!!! Our first harvest. It was time to trim back our basil and dill, plus a huge pile of beautiful swiss chard! Here are some pics of the garden...

We found a bunch of tires at an estate sale and have placed them around the back yard to house our herbs. The picture above is a few cucumber plants.


Here's a shot of the whole garden area. On the right is the Swiss chard, in the back are some tomatoes. You can see the broccoli on the back left side. In the very front is a zucchini and in between the broccoli and zucchini are peppers: red and green bells, poblano, and jalapeno.


Can't wait till our cucumber plant give us some presents to pickle with the dill!


I feel a batch of pesto coming our way, soon!


Here's the harvest in the King Soopers basket that BJ stole...turns out it' works perfect as a harvesting bucket :)


Tomorrow night is a zucchini and swiss chard tart...yummm, will post soon!

July 3, 2009

Roasted Cauliflower Pizza

Music: Regina Spektor, Far - her new album - it's pretty friggin' awesome if you haven't had the chance to listen to it yet. Released on June 23, 2009.
Menu: Pear, pecan, and gouda salad and a big slice of pizza!


Purple cauliflower!!!! I know, crazy! I couldn't believe my eyes when I walked into the grocery store and saw green and purple cauliflower for $1.50/head; I know, crazy! Anyways, I had just run into the store to grab a few quick things, but I obviously could not resist these puppies.


After much deliberation - au gratin, indian, roasted cauliflower pasta, the list goes on. BJ had the idea of a pizza. Perfect, I thought! So, I made a thick and hearty whole wheat dough. Roasted some garlic, shallots, and the cauliflower and added some feta. It was mighty tasty. Light and healthy, too!

I just can't get over that it was green and purple! Okay, so what if you had these two lovely heads of colorful cauliflower, what would you make???


Roasted Cauliflower Pizza

Ingredients:
  • 1 batch of whole wheat pizza dough
  • EVOO
  • S & P
  • 1 whole head of cauliflower, cut into pieces (I used half of each head)
  • 1 head of garlic, white skins removed, but keep heads intact
  • 1 large shallot, skinned
  • 1 tspn. thyme (use less if dried)
  • 1 cup feta cheese
Directions:
  1. Heat oven to 400.
  2. Drizzle garlic and shallot in EVOO. Wrap each in tin foil. Place on baking sheet.
  3. Toss cauliflower pieces with EVOO and S & P in a large bowl until pieces are coated. Place cauliflower on same baking sheet and roast in over for 12 minutes, flipping cauliflower once.
  4. Remove cauliflower and set aside. Continue roasting garlic and shallot for another 10 minutes.
  5. Remove garlic and shallot from oven and let cool. Place pizza stone in oven and reduce temperature to 375.
  6. Carefully remove garlic and shallot from foil. They should lightly browned and squishy. Chop the shallot. Remove each garlic clove by gently squeezing the head. Each clove should pop out easily. Sometimes you have to stick your finger or the tip of a fork to help move it along. Place garlic cloves in a bowl and mash with a fork. Add the chopped shallot.
  7. Add S & P and thyme to garlic mixture. Slowly drizzle in EVOO until the mixture resembles a light sauce.
  8. Dust pizza peel with cornmeal. Place dough on top of cornmeal. Top with roasted garlic sauce. Then add cauliflower pieces. Lastly, sprinkle pizza with feta.
  9. Slide the pizza off the peel and onto the stone. Bake for 20 minutes, or until crust is browned on the bottom and feta is beginning to brown.
  10. Remove from oven and let cool for 5 minutes. Slice into pieces and serve!

July 1, 2009

Grilled Portobellos

Music: The Allman Brothers Band, An Evening with the Allman Brothers (PS - for our first anniversay, we are going to see Allman Brothers live at Red Rocks!!!)
Menu:
Strawberry and Almond Salad with a creamy poppy seed dressing, grilled garlic corn, and grilled portobello's on homemade potato rosemary bread!


So, the real star of this meal was the potato rosemary bread. The recipe came from another food blog, Smitten Kitchen...check out the recipe here. Anyways, the bread was quite a production, but if you have some time and are craving some fresh, hot out of the oven rosemary bread, I highly recommend this recipe. There are few things better than a fresh slice of bread with a smidge of butter that melts instantly...yummmm.

N-E-ways...we realized we haven't blogged about our staple meal...grilled portobellos. We eat them almost once a week. On buns, without, with mozzarella melted on top, with various aioli's, or just by themselves. If you haven't ever had a grilled portobello mushroom, well you are missin' out.

We also whipped up a big strawberry salad, since the strawberries are out in full force. It is usually a necessity for me to have freshly chunked blue cheese on my strawberry salad, but I didn't have any around. So, I had never made a poppy seed dressing, but whipped up something, which turned out great! It was light, creamy, with a nutty flavor. We topped the salad with sliced almonds and called it a night. I think a lot of times we are pressed to create a big salad full of toppings like we get in restaurants. I've found that the best salads we have are on those nights when I have some spinach or lettuce and throw whatever's in my fridge on top. Here's the key - pick a theme around one ingredient and then round your food group bases. Got an apple you just have to use? Try pairing it with thick cheddar chunks and pecans. My formula is fruit or veggie, cheese, nuts, and always green onions. Give it a try next time you feel like makin' a salad. Now, finally, the recipe!

Grilled Portobello Mushrooms
Ingredients:
  • 2 - 4 large portobello caps, wiped clean of dirt and stems removed*
  • 2 large cloves of garlic, minced
  • 1 TB fresh rosemary, chopped (if using dried herbs, just decrease the amount by about half)
  • 1 1/2 tspn. fresh thyme, chopped
  • Freshly ground black pepper
  • Pinch of crushed red pepper, optional
  • 1 TB Worcestershire sauce
  • 1/4 cup balsamic vinegar
  • 1 TB EVOO
  • Salt
Directions:
  1. Preheat grill to medium-heat.
  2. Combine Worcestershire, vinegar, and EVOO in a small bowl.
  3. Starting gill side down, rub half of the dry ingredients (garlic, rosemary, thyme, peppers) into mushrooms. Drizzle with about 1/4 of the wet ingredients.
  4. Flip mushrooms and sprinkle with remaining dry ingredients and pour the rest of the wet ingredients over mushrooms.
  5. Set aside and let marinate at room temperature for about 25 - 30 minutes (can be as little at 15 and as much as an hour, I have found that this range works best).
  6. Remove mushrooms from marinade and sprinkle with salt just before grilling.
  7. Turn heat down to medium and place mushrooms GILL SIDE DOWN** and grill for about 5 - 6 minutes. Flip mushrooms and grill for another 3 -5 minutes. Add cheese after about a minute or so. Close grill while mushrooms cook for best flavor.
  8. Serve 'em plain or on a bun, but please enjoy!
*Some say to remove the gills inside the mushroom cap. I have done this once or twice and find that it's messy, a pain, and I think the gills help soak up all the yummy marinade.

**Everytime we grill mushrooms in our household, wepromptly yell, "gill side down first!" Why? Good question. When mushrooms cook, they begin to lose their firm shape and release their juices (this is why you salt just before grilling or when sauteeing, salt after the mushrooms brown and release juices...). Think about a mushroom, cap side up on a grill, releasing all it's juices...into the cap. The juices pool up and when it's time to flip it over you ruin your fire! So, join us in our routine, and happily yell, "gill side down first!" to help you remember before you cook 'em!